GPAModelBuilder WebApp customized operator parameters |
Feedback |
Essentials
- The custom component development uses the
Vue.js technology. This guide assumes that you have the Vue.js development experience, and have the knowledge
of Single File Components and Listening to Child Components Events.
- FLog
in to the iServer (http://localhost:8090/iserver/admin-ui/home/) and
access the root resource of the Processing Automation service by going
to geoprocessing/restjsr under Processing Automation service in the
list of iServer services and selecting " Tools List" to
see all the tools provided by the Processing Automation Service as
well as the descriptions of the custom tools you have included.
Environment preparation
Before the development, please install Git and Node.js
in your machine. And install a Vue.js editor, such as HBuilderX or VS
Code.
Development process
- Clone the demonstration project project
gpamodelbuilder-custom-components by executing the following command:
git clone https://gitee.com/isupermap/gpamodelbuilder-custom-components.git
The downloaded project directory contains the following
main contents:
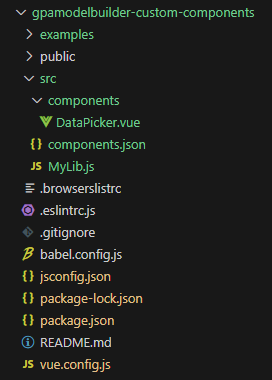
Among them:
- src stores the custom component code and configuration
file (components.json).
- In the src-components directory, create
Component.vue, which is the functional component of the custom component.
| Field |
Type |
Descriptive |
| value |
String |
The component gets the padding value passed in by the gpa props.value |
| change |
Function |
Component's processed data callback emit ("change",
processed data) |
- Register the newly created custom component
in the src/components.json file. For example, the sample DataPicker
configuration is shown below:
{
"DataPicker": {
"name": "data-picker",
"paramTypes": ["ENUM"],
"paramIDs": [{
"toolID":
"iobjects_image_processing:openimage",
"inputID":
"ImageFilePath"
}]
}
}
Fields introcution:
| Field |
Type |
Required or not? |
Description |
| name |
String |
Y |
Customize the component display name. Needs to be consistent
with the name defined in Component.vue. |
paramTypes |
Array<string> |
N |
Apply to type-identified set items, multiple [xxx,xxx]. Optional:
ENUM, BOOLEAN, CONNECTION, SELECTFILEPATH, STRING, CREATEFILEPATH,
COMPOSITIONFIELD. |
| paramIDs |
Array<object> |
N |
Apply to id-identified set items, multiple [{toolID,inputID},{toolID,inputID}].
|
paramIDs fields
introcution:
| Field |
Type |
Required or not? |
Description |
| toolID |
String |
N |
Processing automation tool ID. |
| inputID |
String |
Y |
Processing automation input parameter ID. |
toolID and inputID: go to http://{ip}:{port}/iserver/services/geoprocessing/restjsr/gp/v2/list and look up the operator details.
- Install the project dependencies by executing
the following command in the project root directory :
npm install
- Once the code is written, you can debug
it.
npm run serve
- Once the code has been written and debugged,
you can compile it and configure it for use in iPortal.
Run the following command to build :
npm run build
- Copy the contents of the customComponents
directory to [iPortal Product Packages]/webapps/iportal/resources/GPAModelBuilder/customComponents,
visit iPortal in your browser,
log in, and then click "Process Automation Modeling", in
the opened page, select the "Tools" tab in the left panel,
drag and drop the operator to the canvas, and then you can see the
customized components in the Operator Parameters on the right side
of the panel (you don't need to restart iPortal).
Note:If the extension effect
doesn't show in step 7, please refresh the page, or delete the browser
cache, and try again.