
Integrating an existing account system by using LDAP |
LDAP ( Lightweight Directory Access Protocol) is the lightweight directory access protocol, Implementing information Services called directory Services. The directory service is a special database system, which is specifically optimized for reading, browsing and searching operations.
The information in the LDAP directory is organized in tree structure, and the specific information is stored in the data structure of the item (entry). Entry equals to records in the relational database; entry has DN (Distinguished Name) attribute; DN is used to refer to entry, and it equals to primary key in the relational database table. Attribute contains Type and one or more Values, and it is equivalent to Field which contains field name and data type. Just in order to facilitate the retrieval, LDAP type can have multiple values which is different with the relational database. The entries in LDAP are organized according to the location and organization relationship in a very intuitive way. LDAP stores the data in the file, and can use the index based file database instead of relational database for improving the efficiency. An example of the type is mail, whose value will be an email address.
To design the directory structure is one of the most important aspects of LDAP. Here we will illustrate how to design a reasonable directory structure by using a simple example. The example will be accessed through the Netscape address book. Suppose there is a company located in the United States US (c=US), across multiple states and named Acme (o=Acme). Acme wants to implement a small address book server for all employees.
Start from the simple structure DN:
dn: o=Acme, c=US
In Acme all the organization's classification and attributes will be stored under the DN, the directory the DN is stored in the server is unique. In Acme the employee's information is divided into two categories: Managers (ou= managers) and ordinary employees (ou=Employees). RDN (relative distinguished names) is expressed relative to a vertex DN as:
dn: ou=Managers, o=Acme, c=US
dn: ou=Employees, o=Acme, c=US
In the following we'll see the composition of the hierarchy: the top node is Acme in US, under it there are manager organization unit and the employee organization unit. Thus, the DN comprising Managers and Employees is:
dn: cn=Jason H. Smith, ou=Managers, o=Acme, c=US
dn: cn=Ray D. Jones, ou=Employees, o=Acme, c=US
dn: cn=Eric S. Woods, ou=Employees, o=Acme, c=US
To cite the common name entry for Jason H. Smith, LDAP will use RDN where cn=Jason H. Smith. And then combine the previous parent entry to form the following tree structure:
cn=Jason H. Smith
+ ou=Managers
+ o=Acme
+ c=US
-> dn: cn=Jason H. Smith, ou=Managers, o=Acme, c=US
Now you have defined the directory structure, the next step is to import directory information. Directory information data will be stored in the LDIF file, which is the default file for importing directory information data. Users can easily write Perl scripts to create LDIF files from the system file such as /etc/passwd, NIS, etc..
LDIF is a universal file format used to describe directory information or to modify directory. LDIF is completely independent of the storage format used in all specific directories, and it is typically used to export directory information from the LDAP server or import data into the LDAP server.
LDIF is generally easy to be generated. Thus, you can use some tools (such as awk or Perl) to move data from specific formats to LDAP directory. You can also write scripts to generate test data for LDIF format.
Before setting OpenLDAP, it's needed to create a LDIF file, take creating the openldapfortest.ldif file as an example:
dn: ou=People, dc=maxcrc, dc=com
objectClass: top
objectClass: organizationalUnit
ou: People
description: Container for user entries
structuralObjectClass: organizationalUnit
entryUUID: fea960bd-a082-457c-bbdc-f92d83f3c3d8
creatorsName: cn=manager, dc=maxcrc, dc=com
createTimestamp: 20140801020034Z
entryCSN: 20140801020034.844507Z#000000#000#000000
modifiersName: cn=manager, dc=maxcrc, dc=com
modifyTimestamp: 20140801020034Z
dn: ou=groups, dc=maxcrc, dc=com
objectClass: top
objectClass: organizationalUnit
ou: groups
structuralObjectClass: organizationalUnit
entryUUID: 10fbce96-7085-4f00-be47-a99c9d85e72f
creatorsName: cn=Manager, dc=maxcrc, dc=com
createTimestamp: 20140804023216Z
entryCSN: 20140804023216.519824Z#000000#000#000000
modifiersName: cn=Manager, dc=maxcrc, dc=com
modifyTimestamp: 20140804023216Z
dn: uid=bob, ou=People, dc=maxcrc, dc=com
objectClass: posixAccount
objectClass: top
objectClass: inetOrgPerson
gidNumber: 0
sn: test
uid: bob
uidNumber: 49223
homeDirectory: test
structuralObjectClass: inetOrgPerson
entryUUID: fd3a66e0-635a-414a-b2e8-70874c1c81dd
creatorsName: cn=Manager, dc=maxcrc, dc=com
createTimestamp: 20140804033305Z
cn: bob2
givenName: bob2
userPassword:: e1NIQX01ZW42RzZNZXpScm9UM1hLcWtkUE9tWS9CZlE9
entryCSN: 20140923021306.643518Z#000000#000#000000
modifiersName: cn=Manager, dc=maxcrc, dc=com
modifyTimestamp: 20140923021306Z
dn: uid=alice, ou=People, dc=maxcrc, dc=com
objectClass: posixAccount
objectClass: top
objectClass: inetOrgPerson
gidNumber: 0
givenName: alice
sn: test
displayName: alice
uid: alice
homeDirectory: test
cn: alice
uidNumber: 4193
structuralObjectClass: inetOrgPerson
entryUUID: c8122bdc-2db6-49c7-811a-04e2fa343fd3
creatorsName: cn=Manager, dc=maxcrc, dc=com
createTimestamp: 20140804033308Z
userPassword:: MTIzNDU2
entryCSN: 20140918064051.754045Z#000000#000#000000
modifiersName: cn=Manager, dc=maxcrc, dc=com
modifyTimestamp: 20140918064051Z
dn: uid=bill, ou=People, dc=maxcrc, dc=com
objectClass: posixAccount
objectClass: top
objectClass: inetOrgPerson
gidNumber: 0
givenName: bill
sn: test
uid: bill
homeDirectory: test
cn: bill
uidNumber: 4542
structuralObjectClass: inetOrgPerson
entryUUID: 29c3c904-0ccb-493b-b841-fe1452fac891
creatorsName: cn=Manager, dc=maxcrc, dc=com
createTimestamp: 20140804033312Z
userPassword:: MTIzNDU2
entryCSN: 20140804055604.649500Z#000000#000#000000
modifiersName: cn=Manager, dc=maxcrc, dc=com
modifyTimestamp: 20140804055604Z
dn: cn=ldapadmin, ou=groups, dc=maxcrc, dc=com
objectClass: posixGroup
objectClass: top
cn: ldapadmin
memberUid: bill
gidNumber: 19399
structuralObjectClass: posixGroup
entryUUID: d3a990b1-5227-44b5-9c9d-7328a821b56a
creatorsName: cn=Manager, dc=maxcrc, dc=com
createTimestamp: 20140918062008Z
entryCSN: 20141016061223.535652Z#000000#000#000000
modifiersName: cn=Manager, dc=maxcrc, dc=com
modifyTimestamp: 20141016061223Z
dn: cn=ldapuser, ou=groups, dc=maxcrc, dc=com
objectClass: posixGroup
objectClass: top
cn: ldapuser
memberUid: alice
gidNumber: 31590
structuralObjectClass: posixGroup
entryUUID: d63843a6-6e87-4fdf-830d-d7fc93286a83
creatorsName: cn=Manager, dc=maxcrc, dc=com
createTimestamp: 20140918062028Z
entryCSN: 20141016061238.615730Z#000000#000#000000
modifiersName: cn=Manager, dc=maxcrc, dc=com
modifyTimestamp: 20141016061238Z
dn: cn=ldappublisher, ou=groups, dc=maxcrc, dc=com
objectClass: posixGroup
objectClass: top
cn: ldappublisher
memberUid: bob
gidNumber: 51276
structuralObjectClass: posixGroup
entryUUID: a4305015-9098-4957-a703-a1aeebbcd77e
creatorsName: cn=Manager, dc=maxcrc, dc=com
createTimestamp: 20140918062410Z
entryCSN: 20141016061140.167443Z#000000#000#000000
modifiersName: cn=Manager, dc=maxcrc, dc=com
modifyTimestamp: 20141016061140Z
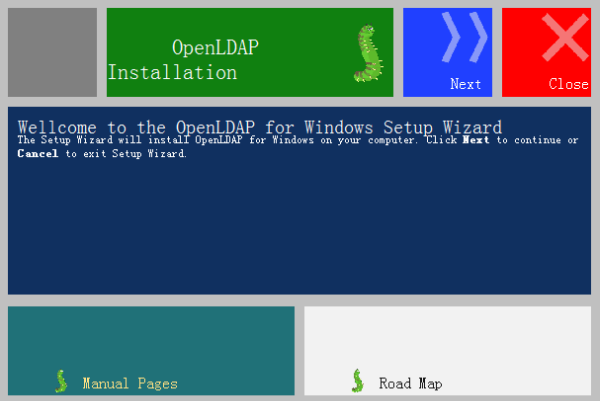
Step 1: Double click OpenLDAPforWindows.exe to show the following interface:
Step 2: Click Yes to show this:
Step 3: Click Next to show this:
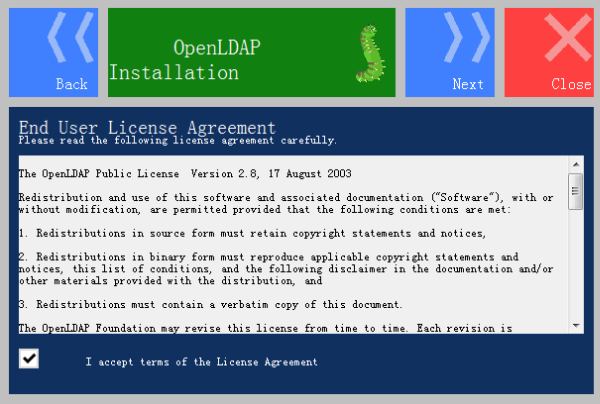
Step 4: Check I accept..., click Next to show this:
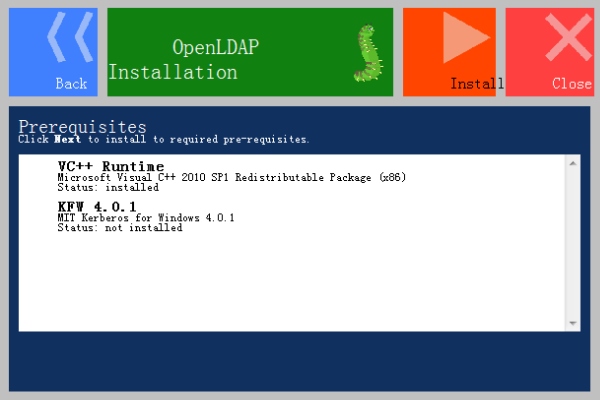
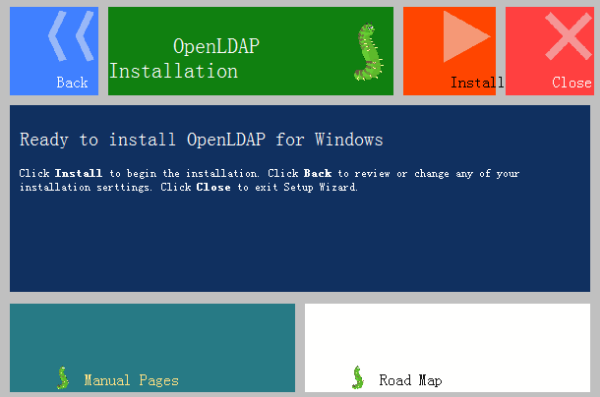
Step 5: Click Install to show this:
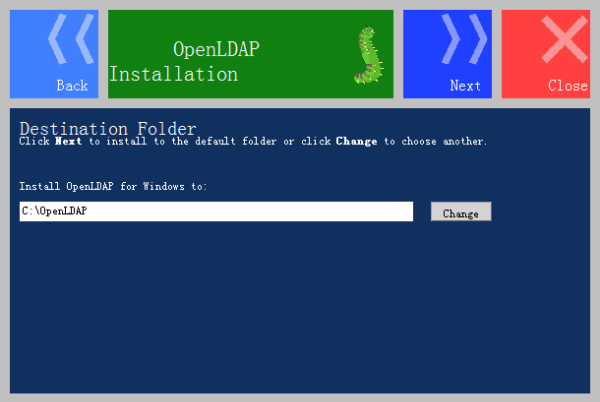
Step 6: Choose the installation directory, click Next to show this:
Step 7: Click Next to show this:
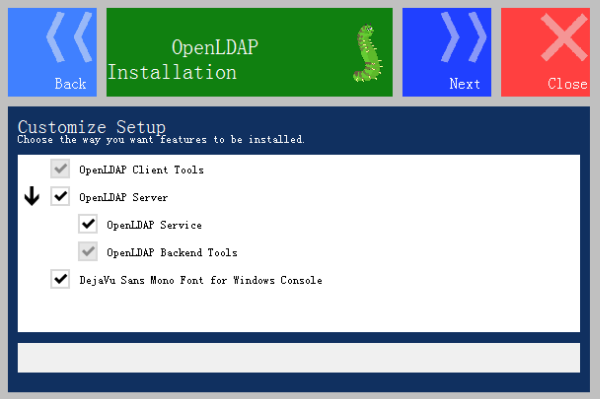
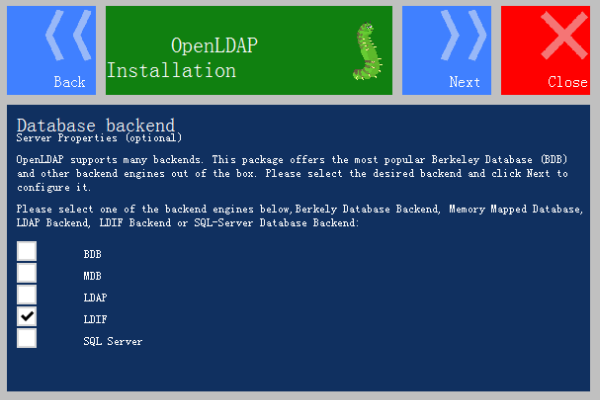
Step 8: Click Next, select to get the back end data from "LDIF" , also can choose other file types, as shown below:
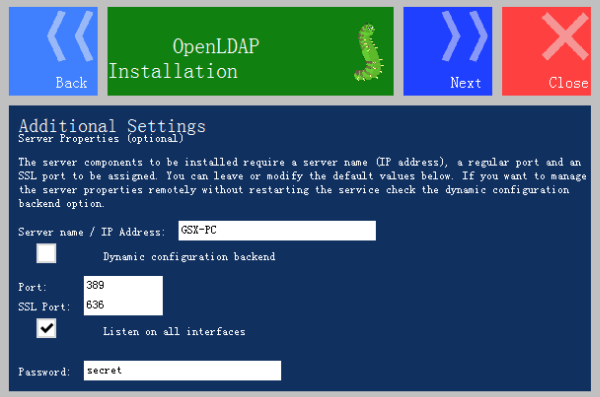
Step 9: Click Next, the default initial password is secret as below
Step 10: Click Next to show this:
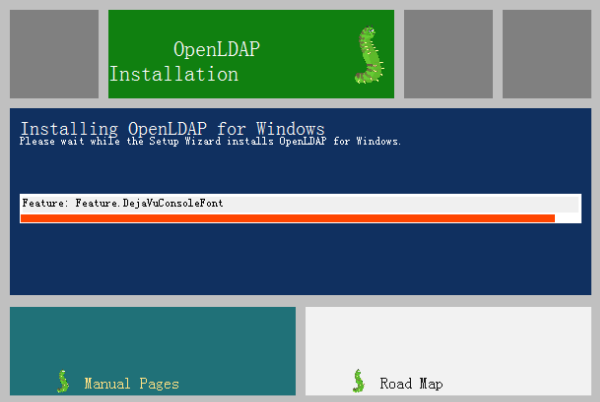
Step 11: Click Install to show this:
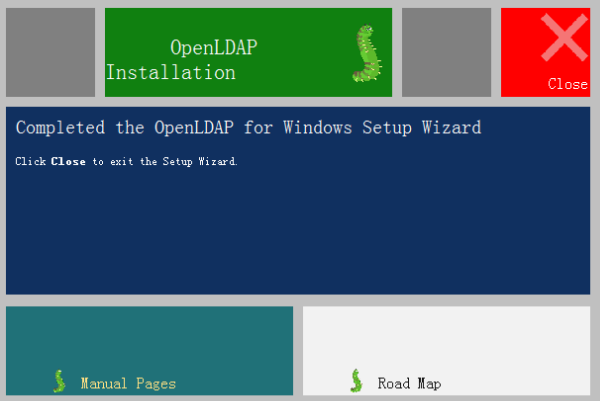
Step 12: After the installation is completed, click Close to show this:
This sample provides a way of using the LdapAdmin.exe editor to connect to the LDAP server and visually configure LDAP directory data.
Open the editor:
Click Start menu, select Connections to pop up a dialog, and then double click New connection to configure:
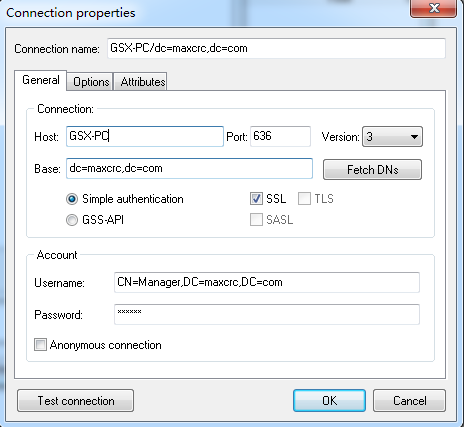
Where:
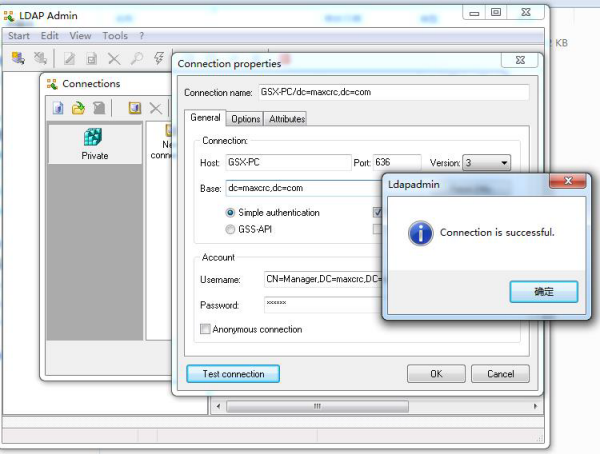
After the setting, click Test connection to test whether LDAP server is connected as follows:
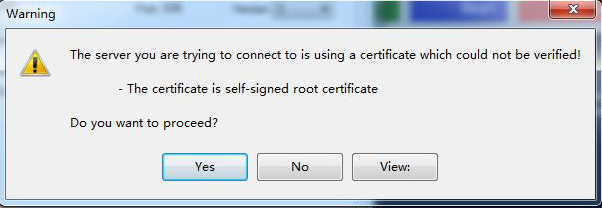
Click Yes to start the test, the following result means the connection is successful:
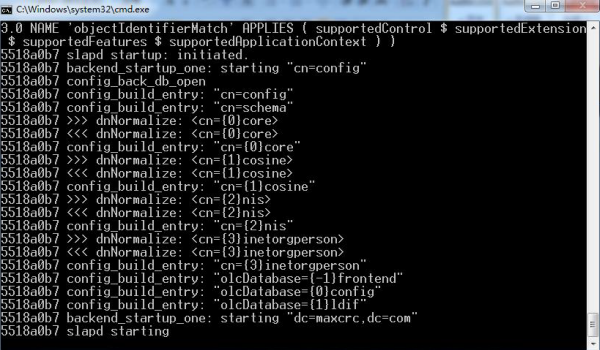
Double click run.cmd file in the installation directory(c:/OpenLDAP/run) to start LDAP service, it means successful as follows:
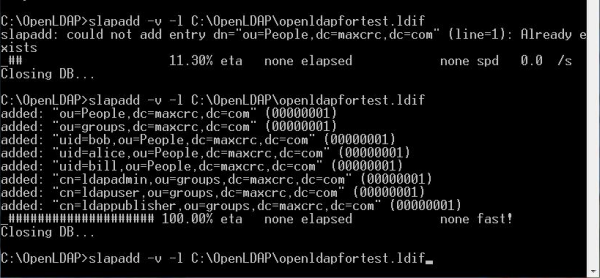
Copy the newly created openldapfortest.Ldif file to the installation directory (C:\OpenLDAP ), then open a command window and enter slapadd -v -l C:\OpenLDAP\openldapfortest.ldif to import the directory data to LDAP server. If there is something wrong, indicating that the organization unit People already exist, you can delete the ou=people folder and ou=people.ldif file in installation directory such as C:\OpenLDAP\ldifdata\dc=maxcrc, dc=com, and then input the above command to import the data again:
Next, you can view the directory data in the editor as follows:
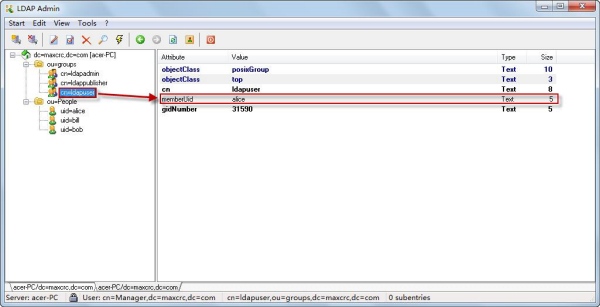
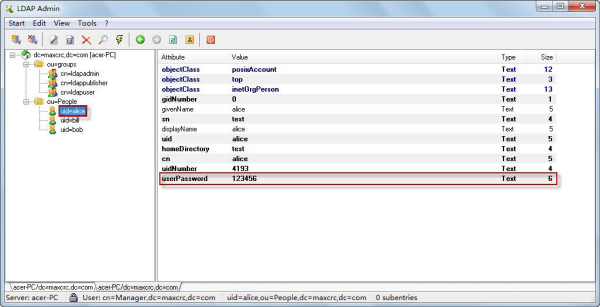
Shown in the diagram is: assign the user "alice" in people unit in groups organization to the ldapuser role in groups organization. Click the user name "alice", it will be able to view the detailed information of the user. You can edit the imported directory data.
First, log in SuperMap iPortal as an administrator, and then click "Management">"Security">"Login Configuration">"LDAP login configuration tab. Detailed configuration information can be referred to: configure the use of LDAP directory.
The role map configuration can be configured through two ways:
First, you can add role map to the LDAP login configuration page when you first configure LDAP login;
Second: if you did not add role map when configuring LDAP login at the first time, then the LDAP users who login to iPortal just have the role of ordinary users "PORTAL_USER". If you want to change the user role for the users who have logged in, please refer to: role management to edit role.
iPortal supports importing specified LDAP users by uploading a CSV file with LDAP user information. The imported users will be added to the iPortal built-in account system and can be used as objects for resource sharing without logging in. Below shows how to import LDAP users:
| Field Name | Definition | Description |
UserName |
the user name | Must match the username of the LDAP user |
Type |
the user type | Including two types: CREATOR and VIEWER |
| Role | user roles | Assigning roles of iPortal to the user. You can assign more than one role to a user, separated by "|" |
Note: When users are not imported, all users in the LDAP system can log in to iPortal; after users are imported, unimported LDAP users cannot log in to iPortal.